Food & Wine Photography on the Go with your DSLR
Food & Wine Photography on the Go
Are you the person in your group who loves to capture those fun food & wine moments? If so, read on. From simple to sophisticated, here are some ideas for capturing better food & wine photos.
Your Phone
Your phone has the prime advantage of always being with you. Always. I wrote an article on food & wine photography with your phone over on Winepass Piemonte, a favorite Piedmont travel website of mine. Jump over to Winepass for some hints, then come back here for more!
You can take great photos with your phone, if you know how.
Your DSLR Camera
Once you go beyond your phone, the next question is how much camera to you need? Can you choose one camera solution for all your travel photo needs? Food & wine photos will take you into many dimly lit places such as dingy wine cellars and romantic restaurants.

Old cellars at Domaine Jean-Louis Chave – it was SO dark; the camera could see more than I did. Flash would ruin the feeling of the photo.
For low light, physics dictates a large sensor, and that means a DSLR. You can use a point & shoot compact camera, but it won’t do any better than your phone in low light. A DSLR, however, will take you deep into those low light situations.

It was way darker than this in the cellar. Low light = slow shutter speed. I’d still take the motion blur and preserve the moment
Four Tips for Using Your DSLR
You’ll notice these are almost the same 4 tips as better photos with your mobile phone. No surprise, they are fundamentals of good photography.
1. Turn Off the Flash
Never, under any circumstances set your DSLR on the “green” camera mode. It will take over all settings and pop up the flash all by itself, yuch! Seriously, if you leave the camera in the green camera mode, you wasted your money on the DSLR. If you’re a beginner, “P” (program) is fine, and you may use it a lot for quick shots. Resist the temptation to turn on the flash, just hold the camera steady and give natural light a try. Take a look at the results, and you’ll be sold. Don’t believe me? Try it both ways!
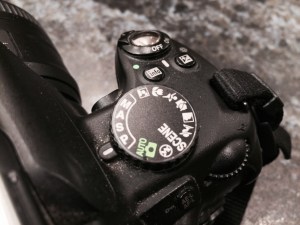
See that Green “Auto” setting? NEVER use it. There, I said it.
For food and wine photos, you’ll want to use Aperture priority (“A” on the dial) most of the time, and use the largest aperture possible (that is the lowest “f” number, such as f/3.5 in the photo).
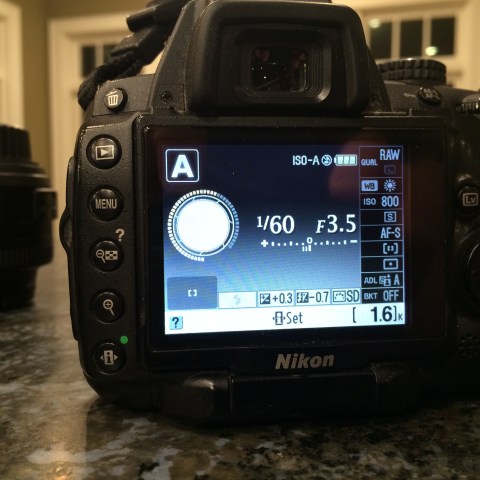
Get comfortable with adjusting settings, it’s worth it
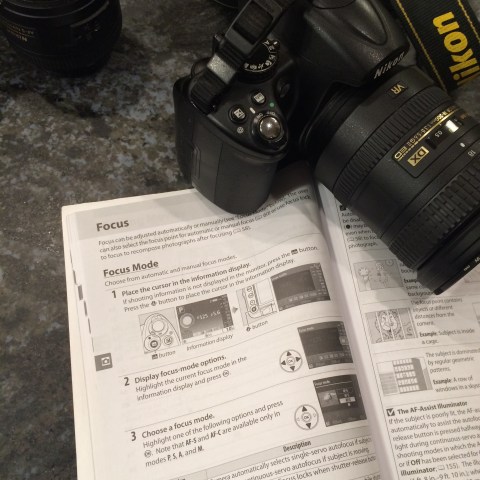
2. Learn Your Camera & Processing Software
Before your trip, sit down with a glass of wine and the instruction manual for your camera and learn a few key things. Learn how to set white balance, how to control where the camera focuses, how to adjust exposure, how to capture video, multiple exposures, and self timer. Try everything, take pictures, you can erase them later.
The nice thing with digital is that you can actually take the photo and see what the effect is.
If you’re serious enough to own a DSLR, you should also invest in learning your photo processing software. I’m a big fan of Adobe Lightroom. Lightroom efficiently supports all the photo processing I need to do and it very effectively helps me manage the tens of thousands of photos I have.
3. Take Advantage of the Unique Capabilities of Your DSLR
- Shoot in raw mode, white balance & gray card – shooting in raw simply means the unprocessed image is saved. JPG files are smaller, but they are less flexible for adjustments after the fact, and you’ll often want to tweak the color balance when you’re shooting food & wine.

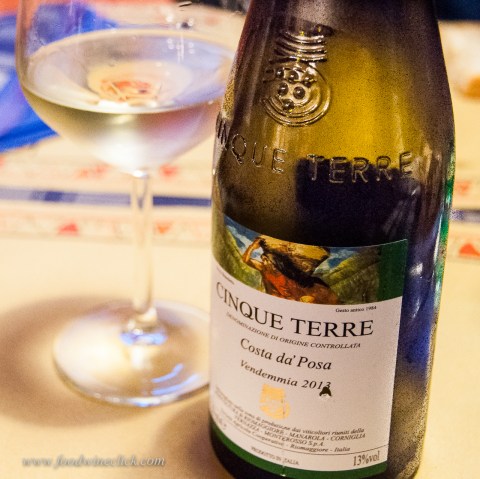
Bright sunny day in the Cinque Terre. We’re eating outdoors, but the light is filtered through the beautiful unbrellas.
Tough job for any automatic system. Left side is the camera “daylight” white balance. Right side, adjusted by using the white in the plate. Not as easy if the file is .jpg
White light comes in many colors: sunlight is different from shade is different from incandescent. Understanding your camera’s white balance will help you capture accurate colors to begin with. Even though it seems “old school”, I always carry a gray card. Just pop it in a first test photo in the setting where you are, then remove it. You can use it to correct or fine tune the white balance with all the photos in that setting. It’s much faster than setting a custom white balance.
Use natural light, and YOU choose the point of focus.
- Selective focus & setting the focus point – Since I have the aperture set wide open (lowest f number), a small portion of the photo will be in focus. This helps bring your viewer’s attention to the most important element in the photo. Your DSLR will let you select from a variety of autofocus modes, with a choice of up to 50+ autofocus points.
Pick the point of focus and draw your viewer’s eye to that point.
- When shooting food especially, you need to choose the point of focus; don’t let the camera do it for you! For most of my food & wine shooting, I use the center autofocus point, focus where I select, hold that focus, then compose the shot. It’s quick and if I choose the wrong point of focus, at least it’s my fault, not the camera.
4. Use Your Artist’s Eye
Once you know your camera, you can unleash your creativity. Click on any photo to start the slide show with some useful hints.


DSLR Kit for Travel
While I’m willing to carry a bigger camera, I’m not interested in lugging a huge camera bag with multiple lenses. My travel kit fits easily into a sling bag, even smaller than a day pack. Here’s my advice:
DSLR from one of the major manufacturers, they all make excellent products. Choose your camera based more on the lens choices available than anything else. You invest in glass once and use the lens for a long time. In the digital world, you’ll replace your camera body many more times than you will a high quality lens. APS-C sensor cameras (typical for DSLR’s up to $1500) are just fine. A full-frame sensor camera will do even better in low light, but cost and size both get out of hand.
Wide range zoom lens from your camera manufacturer. You’ll spend some major cash, up to $500, on a good quality wide range zoom, but you’ll use it for many, many years. Spend the extra to stay with your camera manufacturer, as you’re much more likely to keep full compatibility over time, as well as having the highest possible quality glass.

Vibration reduction technology in either the camera or the lens. Nikon (VR) and Canon (IS) put the technology in the lens. Pentax puts it in the camera body. Just make sure yours has it!
High quality UV/skylight filter, mostly to protect the front surface of your $$$ lens.
High quality circular polarizing filter, don’t be surprised if it’s $100. The only additional filter I carry. Super useful for reducing glass reflections, which you may need shooting wine glass photos.
Extra SD card, never be without a backup/spare.
Extra battery, and don’t forget the charger.
Microfiber cloth, gray card.
Sling bag or small backpack.
Skip or leave at home: extra flash, tripod, extra lenses.
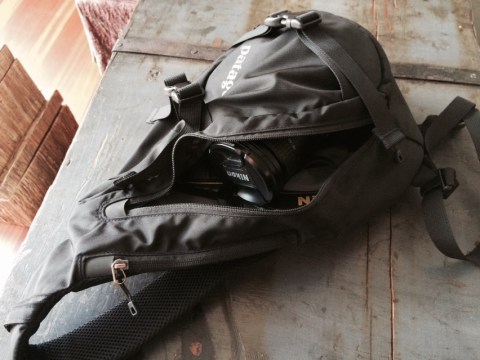
Everything fits in the sling bag, with extra room for sunglasses.
My Personal Setup
- Nikon D-5000 – mid-level enthusiast APS-C DSLR (Today’s model is D-5500)
- Nikon 18-200 VR lens – currently retails for $600. The 18-140mm is also very nice and a little lighter.
- ProMaster 72mm UV filter and circular polarizing filter
- Extra battery, extra 16GB SD card,microfiber cleaning cloth, gray card
- Patagonia, or Patagucci as we say at our house, Atom Sling
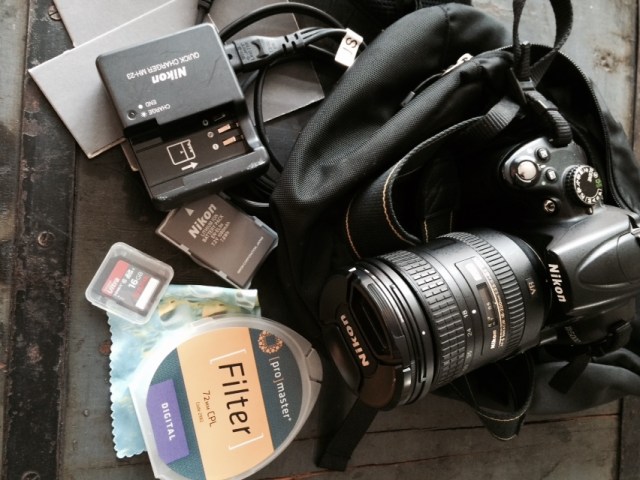
Big, heavy camera bag need not apply! Everything you need for top quality, on-the-go photos
In the end, the best advice is to use the camera you own, learn how to take advantage of its capabilities, and engage your artist’s brain!


A SUPER post, Jeff!! Your food & wine photos are always amazing. I need to practice some more with my F&W photo strategies . . . thanks for some great tips! Cheers!!
Thanks! I enjoy seeing your weekly photo assignments on Instagram. Maybe they’ll have some food challenges sometime.
Beautiful pics and nice post! You do it all… Love the iphone but still trying to lug out the real dslr! So much better!;)
Thanks, Anna. I agree the DLSR doesn’t always come along, but the phone always does!
Many good points Jeff!
Here’s to that gray card and a nice glass of something.
Fred
Von meinem iPhone gesendet
>
Just don’t spill the wine on the gray card!
Fabulous. I struggle to take good pictures and I do most of my photos with my phone so I am going to check out your article on Winepass Piedmonte. Thanks.
While you’re there, they have LOTS of good content for that future Piemonte trip.
Hi Jeff. I read your article on Winepass Piedmonte. Some of your phone photos are fantastic. Where do you find information close focus, adjusting the white balance and how to set the focus and exposure point. I have and iPhone 5s and there are no options in the camera or in the settings. I would love to learn how to do these things. Thank you for your guidance.
For the stock iphone 5, you touch the touchscreen where you would like the camera to focus. You’ll see a box where you just touched, along with a little sun slider to the right. Then, touch & slide up to increase exposure and down to decrease. White balance is in the edit function (after the photo has been taken), under color, select “cast” it’s manual but can usually help at least some. If I want to really work on the image, I import it into Lightroom, where I have a full range of controls.
You might also consider another camera app, such as VSCO cam or 645 Pro. They give you a bit more control.
Hope this helps!
Very helpful! Thank you Jeff!
Amazing 🙂 what camera do you use?? I have so much to learn from this great group!